
Removing popcorn ceilings can be a daunting task, but with the right guidance and steps, you can transform your space and give it a modern, updated look. Whether you're tired of the outdated popcorn texture, dealing with water damage, or simply want a smoother finish, popcorn ceiling removal is a great way to refresh your home. In this guide, we will walk you through the process of removing popcorn ceilings, also known as acoustic ceilings, to help you achieve a more contemporary and clean aesthetic.
If you're based in Toronto and are looking to tackle this project, we'll explore the options available to you, from DIY methods to hiring professional ceiling removal contractors. By the end of this guide, you'll have a clear understanding of the steps involved in textured ceiling removal and be well-equipped to take on this home improvement project with confidence. Let's begin the journey to say goodbye to popcorn ceilings and hello to a more updated living space.
Tools Required for Popcorn Ceiling Removal
To successfully remove a popcorn ceiling, you will need several essential tools on hand. Firstly, ensure you have a sturdy ladder or scaffolding to safely reach the ceiling. Next, you will need a garden sprayer or a pump sprayer filled with water for wetting the textured surface effectively. Additionally, having a putty knife or a ceiling texture scraper will help you start the removal process smoothly.
Another crucial tool for popcorn ceiling removal is a dust mask or a respirator to protect yourself from inhaling any dust or debris that may be released during the scraping process. It's also recommended to have protective eyewear to shield your eyes from any falling particles. Lastly, a drop cloth or plastic sheeting to cover the floor area underneath the work area will help contain the mess and make cleanup easier after the removal is complete.
2. Step-by-Step Guide to Removing Popcorn Ceilings
First, prepare the room for the removal process by removing all furniture and covering the floors with protective materials. It's important to ensure that the area is clear of any obstacles to make the removal easier and more efficient.
Next, before starting the removal process, make sure to dampen the popcorn ceiling with water. This will help soften the textured material, making it easier to scrape off. Use popcorn ceiling removal Toronto or a spray bottle to apply water evenly across the ceiling.
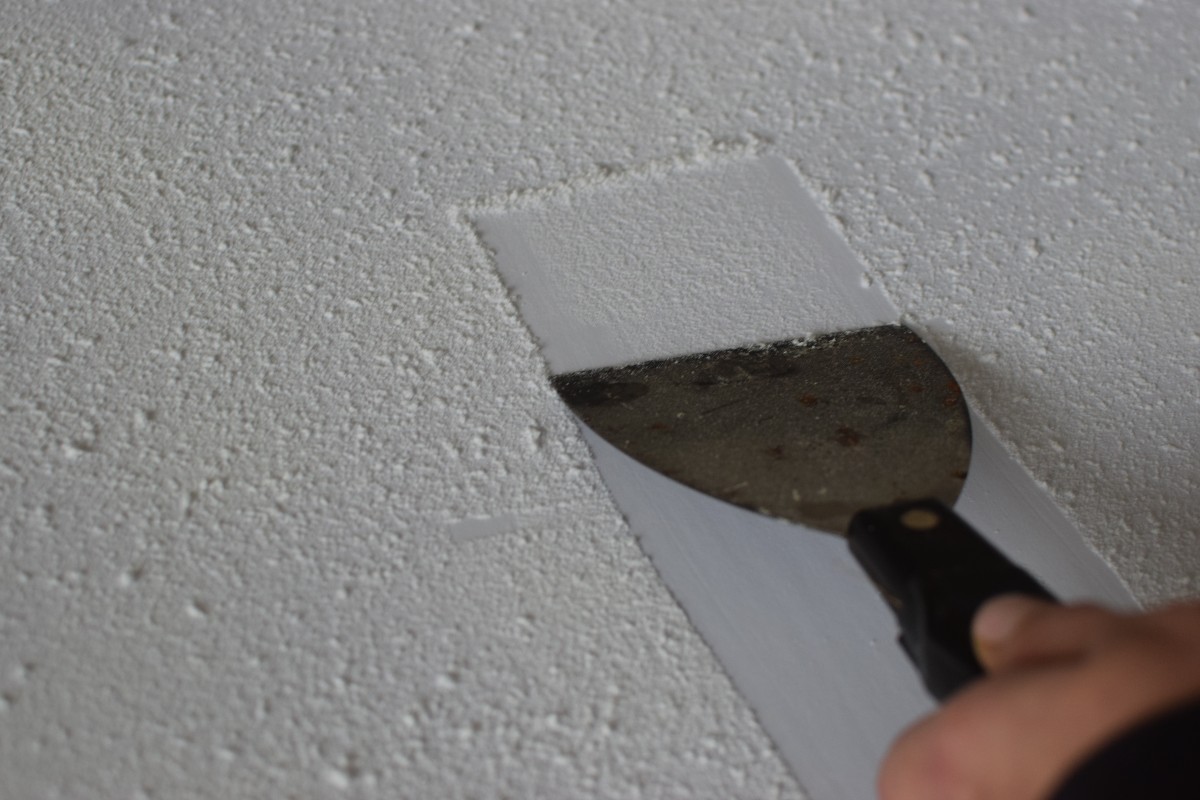
Once the popcorn ceiling is dampened, begin the removal process by carefully scraping off the texture with a putty knife or a ceiling texture scraper. Work in small sections, being cautious not to damage the underlying ceiling. Repeat the scraping process until the entire ceiling is free of the popcorn texture.
Hiring Ceiling Removal Contractors
When considering hiring ceiling removal contractors, it's crucial to do your research. Look for reputable companies in the Toronto area that specialize in popcorn ceiling removal. Reading reviews and requesting quotes from multiple contractors can help you make an informed decision.
Ensure that the ceiling removal contractor you choose has experience in removing acoustic ceilings. This is essential as removing textured ceilings requires specific skills and knowledge to avoid any damage to the underlying ceiling structure.
Finally, don't forget to discuss the timeline and costs involved in the removal process with the contractors. Getting a clear understanding of the project scope and pricing upfront will help you avoid any surprises later on. Remember, hiring professionals for popcorn ceiling removal can save you time and ensure a quality job.